What to Do After a Failed Roof Inspection?
Last Updated: November 14, 2026
Quick Summary
After a failed roof inspection, stop any active leak first, then photograph every flagged area before reading the full report. Get at least two written repair estimates, file an insurance claim if storm damage is involved, and keep all documents for a final reinspection.
- Move furniture and cut power near water, but never climb onto the wet roof yourself.
- A report should include photos, location notes, and the inspector's repair-versus-replacement view.
- Isolated damage on a roof under 10 years old usually calls for targeted repair.
- Have your contractor meet the adjuster on the roof so nothing in the scope is missed.
- Keep the report, estimates, invoice, permits, warranty, and before-and-after photos together.
Table of Contents
- Your First 24 Hours After a Failed Roof Inspection
- Why Roofs Fail Inspections: The Findings That Matter
- Your Roof Inspection Report Checklist
- Repair or Replace? Reading the Findings Honestly
- Getting a Roof Repair Estimate After Inspection
- What You'll Need
- When a Second Roof Inspection Makes Sense
- The Roof Insurance Inspection: Timelines, Adjusters, and Claims
- Reinspection and the Paper Trail That Protects You
- Frequently Asked Questions
Your First 24 Hours After a Failed Roof Inspection
A failed roof inspection is not a verdict on your home. It is a list of problems a qualified inspector found, and most of them have a fix. This guide walks you through what to do next after a failed roof inspection, from stopping an active leak to filing an insurance claim.
The first day matters more than the first month. Water damage spreads fast, and small problems get expensive when they sit.
Step 1: Stop the Water Before You Read the Report
If water is coming in, deal with that first. Everything else can wait an hour.
- Move furniture, rugs, and electronics away from drips
- Put buckets under active leaks and lay towels along the baseboards
- If water is near a light fixture or outlet, cut power to that room at the breaker
- Take a quick phone photo of every wet spot before you clean up
Do not climb onto the roof yourself. Wet shingles are slick, and a fall costs far more than a repair.
Step 2: Photograph Everything the Inspector Flagged
Your inspection report is only half the evidence. The other half is your own photos.
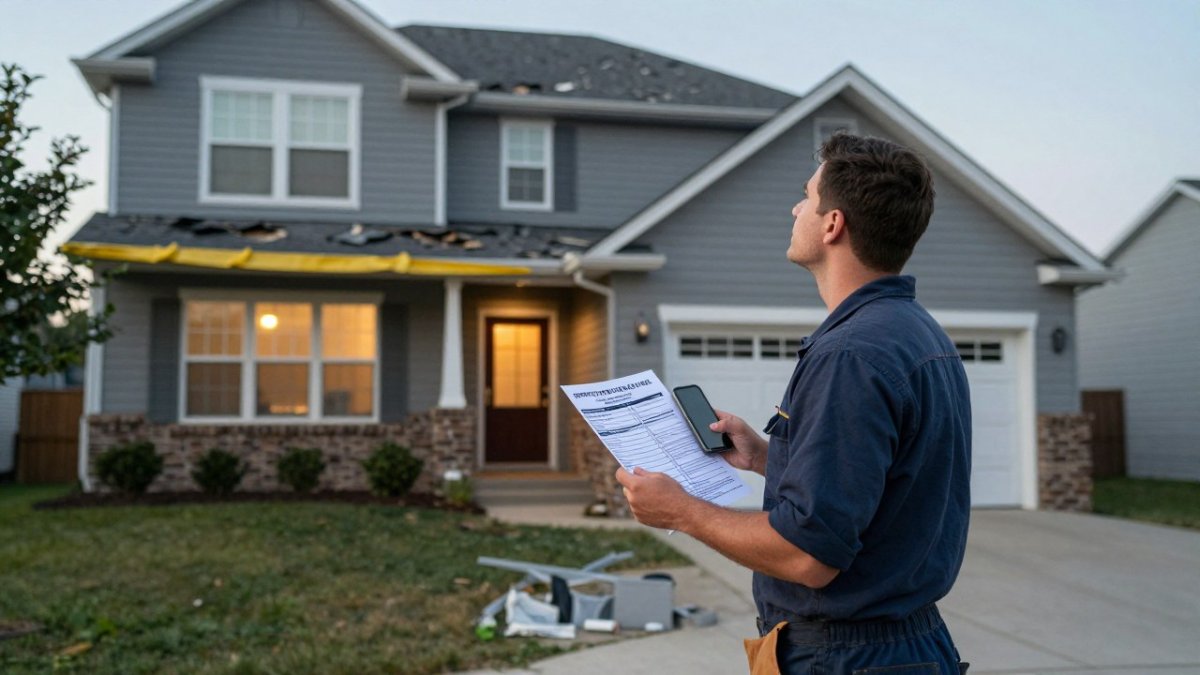
Walk the house and shoot wide and close. Get the damaged shingles, the stained ceiling, the cracked flashing, and the water line on the drywall. These photos can help distinguish isolated impact marks from damage across the roof, a useful starting point when weighing hail damage roof replacement options.
These photos matter for insurance claims, for seller negotiations, and for comparing repair estimates later. Store them in one folder on your phone and back them up.
Why Roofs Fail Inspections: The Findings That Matter
Most failed roof inspections come down to a short list of findings. Learn to spot them in your report and you will know whether you are facing a repair or a replacement.
- Missing or lifted shingles: wind and hail strip the surface, leaving the deck exposed
- Granule loss: shingles look bald or gritty, a sign they are near the end of their life
- Flashing failures: the metal around chimneys, vents, and walls pulls loose and lets water in
- Seam and valley issues: water pools where roof planes meet
- Roof decking damage: soft or rotted plywood under the shingles
- Water intrusion and staining: visible in the attic, on ceilings, or along walls
- Roof age: older roofs fail more often, and many insurers weigh age heavily
Weather does its own damage. Hail, high wind, and summer heat all shorten a roof's life. A roof that looks fine from the street can still fail once someone walks it.
Your Roof Inspection Report Checklist
A proper inspection report should tell you what failed, where it is, and what it will take to fix it. Read yours against this checklist:
- Photos of every flagged area, not just the overall roof
- Clear location notes for each finding
- The inspector's view on repair versus replacement
- Roof age and material type
- Notes on flashing, valleys, and penetrations
- Attic and interior water damage notes
- A written summary you can hand to an insurer or a buyer
If your report is missing these, ask for a revised one. For a deeper look at what a thorough report should contain, see our guide on what is included in a roof inspection report.
Repair or Replace? Reading the Findings Honestly
A failed roof inspection does not automatically mean you need a new roof. The decision comes down to three things: roof age, how many findings there are, and whether the decking is sound.
| Situation | Likely Path | Why |
|---|---|---|
| Isolated damage, roof under 10 years old | Targeted repair | Fix the flagged area and move on |
| Storm damage across one slope | Partial repair or claim | Match the damage to the insurance findings |
| Widespread granule loss or many findings | Replacement | Repairs would only buy time |
| Soft or rotted decking | Replacement with redecking | New shingles need a solid base |
| Roof near end of life | Replacement | Repairs cost more than they return |
Here is the honest test: if the repair cost climbs toward a large share of a replacement, replacement wins. A good contractor will tell you that straight. For a closer look at what fixing the flagged issues actually involves, our roof repair guides walk through the common repairs step by step.
Watch out: a quote that jumps straight to full replacement without photos or a decking check is a red flag. Ask for the evidence.
Getting a Roof Repair Estimate After Inspection
Get at least two written estimates, and make sure each one covers the same scope. Compare them line by line, not by the bottom number. The goal is not the cheapest bid; it is the bid you can verify.
Total Time: 1-2 weeks to gather and compare quotes Difficulty: Easy, if you ask the right questions
What You'll Need
- Your inspection report and photos
- The flagged findings, written out
- A list of questions for each contractor
Ask each contractor:
- What exactly will you repair, and where?
- Will you pull the required permits?
- Is the price fixed, or can it change mid-job?
- What does your workmanship warranty cover, and for how long?
- Are you registered and insured, and can I see proof?
A written estimate should list the repair scope, materials, and a firm price. Be wary of ballpark numbers given over the phone. If you want to judge how accurate an online or quick estimate really is, read our guide on how accurate online roof estimates are.
When you are ready to book, you can request a free inspection to get started.
When a Second Roof Inspection Makes Sense
A second roof inspection is worth the money when the first one feels thin or the stakes are high.
Book one if:
- The report has no photos or vague findings
- A contractor's diagnosis conflicts with the inspector's
- You are buying or selling a home and need a clean record
- An insurer denied a claim you believe is valid
- The first inspection was a quick visual walk, not a full evaluation
A second opinion from a qualified contractor is cheap insurance against a wrong call. Ask for a written summary of findings you can compare side by side.
The Roof Insurance Inspection: Timelines, Adjusters, and Claims
Insurance claims run on a clock, and a failed roof inspection often starts that clock. Report damage quickly, keep every document, and meet the adjuster on site if you can.
Here is the usual order:
- File the claim and get a claim number. Do this as soon as you have the inspection report and your own photos. Most carriers let you file online or by phone, and you will need the date of loss, the inspection findings, and your policy number.
- Schedule the adjuster's visit. Ask for the earliest available slot and confirm whether the adjuster will walk the roof or do a ground-level review. Request the appointment in writing so you have a record.
- Have your contractor meet the adjuster on the roof. An adjuster who walks the roof alone may miss things a contractor would catch. Your contractor can point out lifted shingles, flashing failures, and decking softness that affect the scope.
- Review the adjuster's scope against the inspection findings. Compare line by line. If the adjuster's report omits a flagged area, ask your contractor for photos and a written explanation you can submit as a supplement.
- Approve the work and keep all receipts. Do not sign a final acceptance until the scope matches the repairs you agreed to. Keep the estimate, the adjuster's report, the invoice, and proof of payment together.
A common pattern is that the documentation track and the repair track move at different speeds.
If you are also selling or refinancing, the lender's requirements can add a third clock.
Watch out: do not authorize permanent repairs before the adjuster has seen the damage unless the leak is active and you are protecting the home.
Roof Repair Company offers free storm and hail damage inspections and on-site adjuster meetings to support this step. For the full claims process, our insurance claims guides for Houston-area homeowners go deeper.
Reinspection and the Paper Trail That Protects You
After the repairs, get a reinspection and keep the paperwork. This is the step most homeowners skip, and it is the one that protects you later.
Keep these documents together:
- The original inspection report and photos
- Every written estimate and the final invoice
- The repair scope and materials list
- Permit records and inspection sign-off
- The contractor's warranty in writing
- Before-and-after photos of the repaired areas
A reinspection confirms the work was done right and gives you proof for a future sale, refinance, or claim. If you sell the home, buyers and lenders will ask for this record.
A failed roof inspection is a starting point, not a dead end. The homeowners who come out ahead are the ones who act fast, document everything, and get honest written numbers before anyone touches the roof. Roof Repair Company offers satellite-based roof measurement, instant online pricing in 60 seconds, and written summaries of findings for claims. We are GAF Master Elite certified, registered, certified and insured, and have 1,122 customer reviews.
Frequently Asked Questions
What happens if a roof fails inspection?
A failed roof inspection means the inspector found defects serious enough to affect the roof's performance or remaining life, such as missing shingles, exposed decking, failed flashing, or active water intrusion. It is not automatically a condemnation. You receive findings, photos, and recommended repairs. From there you decide whether to repair, replace, or request a second opinion. In a real estate transaction, the report often becomes a negotiation document, and lenders or insurers may require proof that flagged items were corrected before closing or coverage continues.
Should I get a second roof inspection after a failed inspection?
Get a second roof inspection when the first report recommends full replacement but shows no photos of decking damage, when the inspector has a financial stake in the repair, or when your insurance adjuster's findings conflict with the contractor's. A second opinion from a registered contractor who provides written findings and photos costs little compared with a replacement. If both inspections agree on the same defects, you have confirmation. If they disagree, the photos and written scope usually show which assessment is grounded in what is actually on the roof.
Is the seller responsible for roof repairs after a home inspection?
Responsibility depends on your contract, not on the inspection alone. In most Texas resale contracts, the seller is not automatically obligated to repair anything, but the buyer can request repairs, a closing credit, or a price reduction during the option period. The seller can agree, counter, or refuse. What matters is getting a written repair estimate after inspection so the request is tied to a real number. Vague requests like fix the roof get vague responses. A line-item scope with photos moves negotiations faster.
How long does it take to repair a roof after a failed inspection?
Most repair scopes take one to three days on site once materials are available, while a full replacement typically runs one to three days for an average home. The longer waits are scheduling and documentation: contractor availability after a hail event, permit review, and insurance adjuster scheduling. If a roof insurance inspection is involved, add time for the adjuster's report and any reinspection. Ask your contractor for a written start date and a completion window before you sign, and confirm who handles the reinspection photos for your lender or insurer.